Customizing the colors and layout of your WordPress theme is one of the most effective ways to make your website unique and align it with your brand. WordPress offers several tools for these modifications, including the Customizer, theme-specific options, and custom CSS.
Why Customize Theme Colors and Layout?
- Brand Identity: Consistent color schemes reinforce your brand and create a professional appearance.
- User Experience: A well-organized layout improves navigation and accessibility.
- Differentiation: Custom designs make your site stand out from competitors using the same theme.
Using the WordPress Customizer
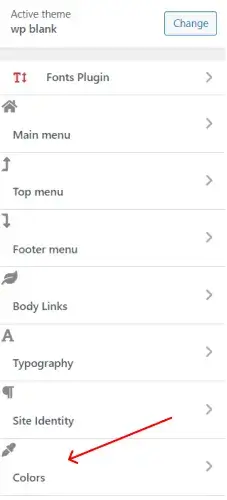
The WordPress Customizer is a built-in tool that allows you to adjust your theme's colors, fonts, and layout with a live preview.
- Log in to your WordPress dashboard.
- Navigate to Appearance > Customize.
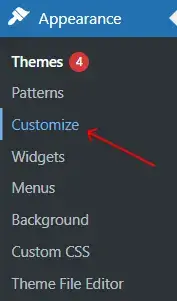
- Look for options like Colors, Appearance Settings, or Typography. These options vary depending on your theme. For example, some themes have a dedicated Color Scheme section.
- Adjust the primary, secondary, and background colors to match your desired palette.
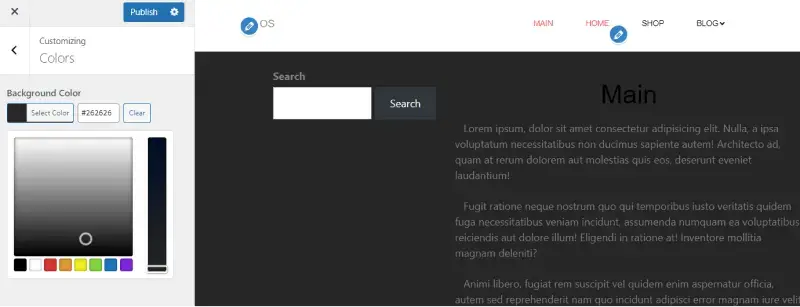
- Click Publish to save your changes.
Modifying Layout Using the Customizer
In the Customizer, find sections like Layout, Site Identity, or Header/Footer Options.
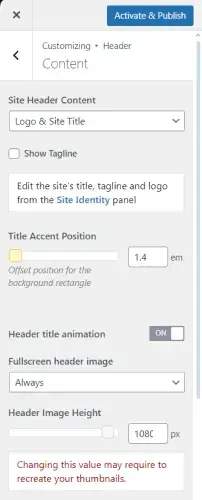
Use the provided sliders, dropdowns, or drag-and-drop tools to modify:
- Header Position: Fixed, sticky, or standard.
- Sidebar Layout: Left, right, or no sidebar.
- Footer Widgets: Number of columns and widget placements.
Preview your changes in real-time and click Publish.
Using Theme-Specific Options
Many premium themes include advanced customization panels, allowing deeper control over colors and layout without coding.
Steps to Access Theme Options
- Go to Appearance > Theme Options or a similar menu specific to your theme.
- Look for tabs labeled Colors, Layout, or Design Settings.
- Adjust colors for individual elements like buttons, links, and headers.
- Modify layout settings such as content width, number of columns, or grid structure.
Editing Colors and Layout Using Custom CSS
If your theme lacks options for specific customizations, you can use Custom CSS.
How to Add Custom CSS
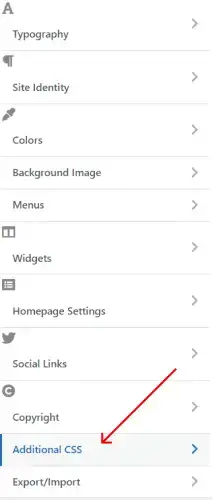
- Open the WordPress Customizer by navigating to Appearance > Customize.
- Click on Additional CSS.
- Add your CSS code to target specific elements. For example:
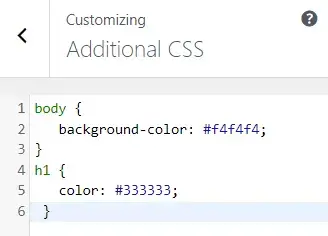 Click Publish to apply the changes.
Modifying Theme Files
For advanced customizations, you may need to edit the theme files directly. This method requires some knowledge of HTML, CSS, and PHP.
Steps to Modify Theme Files
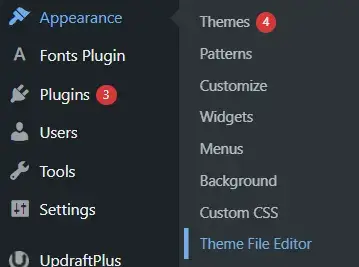
- Navigate to Appearance > Theme File Editor.
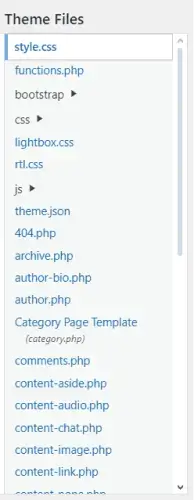
- Locate files such as:
- - style.css for colors and fonts.
- - header.php or footer.php for layout adjustments.
- Make your changes carefully and test on a staging site to avoid breaking your live site.
Using Plugins for Advanced Customizations
If you're not comfortable with CSS or file editing, plugins can simplify the process.
important
- Stick to a Color Scheme: Use tools like Adobe Color to create harmonious palettes.
- Optimize for Mobile: Ensure your layout looks good on all devices.
- Test Before Publishing: Preview your changes to ensure consistency and functionality.
- Backup Your Site: Use plugins like UpdraftPlus before making significant changes.
Customizing your WordPress theme's colors and layout is crucial for building a unique, branded website. With tools like the Customizer, theme options, CSS, and page builders, you can tailor your site to suit your vision and needs. Start small, experiment, and enjoy the creative process!
Other Worpress Articles that may be interesting for you:

